This list will not only aquaint you with some fundamental concepts of Indian cooking, but it will also introduce you to our philosophy on how to create an incredible curry sauce every time, no matter what ingredients you're working with and no matter whether you're making a butter chicken, a korma, or a coconut curry.
This article is a mini masterclass on improvisational Indian cooking. First we'll show you Bhuno, an authentic cooking method we love most, then we'll show you how to prepare a great marinade, then we'll educate you on how to create incredible flavour combinations without using a single-use paste, or curry powder.
We'll show you our philosophy for creating a balanced curry sauce while using fresh ingredients, sharing how-to instructions and recipes along the way. Finally, we'll bring it all together by showing you how all these tips come together to make a supremely delicious coconut curry sauce.
And if you want practice with many of the techniques and hints below, buy a few of Master Indian's spice kits, to get you on the fast-track to preparing authentic Indian food, step-by-step.
We mention Bhuno a lot. That's because to be an awesome Indian cook, it's crucial to have good bhuno technique at your fingertips. Hindi for "roast" or "simmer", Bhuno (boo-na), is the process of slow-frying or slow-cooking certain ingredients.
It is practiced from Punjab to Haryana and in many other parts of India. It is also a part of many North Indian dishes. Be really good at it. That's our first tip.
How to: Simply heat oil or butter on medium or low heat til it's shimmering or sizzling, then add some whole spices, then add aromatics: onions, curry leaves, cilantro, garlic, ginger, celery, even a little fresh basil or thai basil. Then slow-fry these, covered for about 15 to 20 minutes.
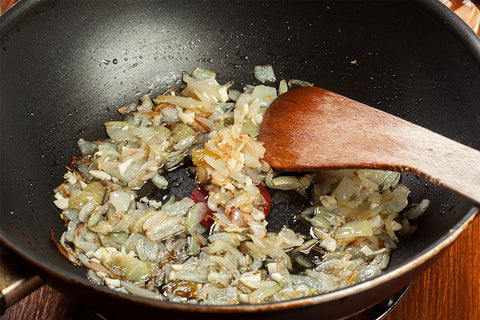
To be great at Bhuno, like most cooking, you just need to pay careful attention. In the vegetable oil, simmer your spices on medium heat until they're fragrant, then add your onion, cilantro, chilies, garlic and ginger.
Cook the mixture at low to medium heat, adding a spice powder such as sambar or garam masala at about the 10-minute mark, and continuing to heat for up to 20 minutes until your mixture is soft or a paste..
Remember, you can substitute these ingredients for many other vegetable ingredients. Cook this mixture of garlic, ginger, onions, and other vegetables and greens down into more or less a paste.
A good marinade is essential to a delicious curry sauce. If you're cooking chicken or beef, or tofu, marination with flavourful ingredienced such as minced garlic, red pepper, and various masalas or spice powders is a must-have skill.
With these three steps: start by briefly heating up fats and/or aromatics, stirring frequently so that all ingredients combine and cook through.
Next, add aromatics and finish by carefully simmering for at least an hour, until flavours combine and meat becomes tender; meat can also be served grilled or steamed, though these methods may tend towards more common trends are a bit less predictable, and therefore climate-based between
A basic Indian marinade recipe often uses:
"Um, don't you just use curry powder to make a curry sauce?" Not really. In India, "curry" is just another word for "saucy entrée". What Westerners think of as Curry powder is a (still quite delicious) British invention.
While it used to be that a lot of North Americans don't know how to make restaurant-style Indian food, that is changing. Creating a restaurant quality-curry sauce is as simple as knowing a few important details.
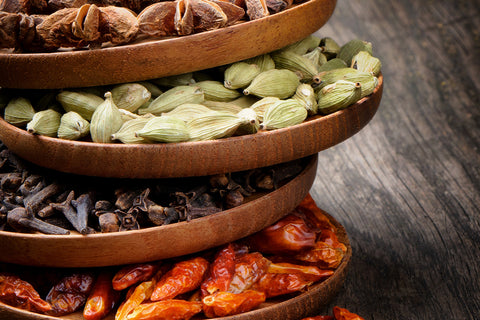
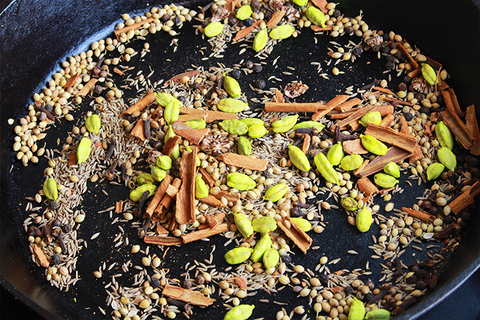
Fresh, whole spices are particuarly important. Whole spices retain their flavour better than ground spices for the simple reason that they have less of their surface exposed to the air, hence the volatile oils stay locked inside.
For this reason, once you start using whole spices (we recommend having a mortar & pestle, and a spice grinder ready-to-hand), to make your curry sauce, you'll never return to pre-ground spices.
How to: Go out and buy whole cardamom, cassia bark, black pepper, nutmeg, cumin, coriander, and others (there's a comprehensive list on our Indian Spices article).
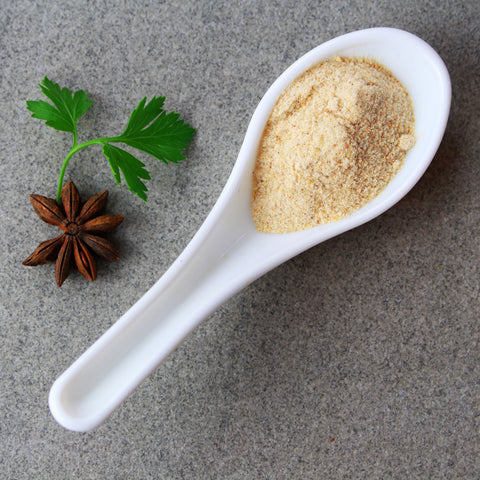
Then you're either going to fry it in oil, or you can grind the whole spices into a powder that you can add to 1-2 cups of sauce. Freshly ground masalas are essential to matching the taste of a restaurant-style curry sauce.
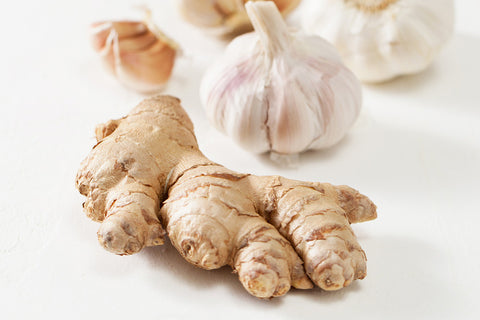
Garlic and ginger are maybe the most-loved ingredients in Indian cuisine. The combination of these two fragrant elements produce an aroma that is an integral part of the many Indian curry sauces, and adds a gorgeous depth and complexity to most of Indian cooking.
Whether it's a coconut curry, a North Indian tomato/onion-based curry, or a tamarind-based curry, you're probably going to use a) garam masala, and b) ginger/garlic paste.
Check out our article on ginger/garlic paste. You can either use a microplane to finely grate the ginger and garlic in roughly equal proportions, or you can use a dash of oil and a blender/grinder).
Add your garlic and ginger while you're frying other bhuno ingredients. Ginger and garlic can also be fried on their own in vegetable oil or mustard oil, along with spices during a taarka or tadka.
There are many different bases you can use for curry sauce. That's one reason there are so many flavours and textures in Indian food.
You cook it so many different ways using so many different recipes. A great curry sauce base usually consists of a few ingredients, usually something creamy, something acidic, and usually those things are blended or mashed to create a hearty texture.
What we think of as a Punjabi curry sauce recipe consists of clarified onions and blended tomatoes. Generally, those two ingredients are blended together after the onions are cooked. Around 2 cups of this thick sauce base will provide a fantastic base for a family of four.
Cooking a curry sauce with lentils and whole spices is a technique used all over India. Many times flour from white lentils is used as a thickening agent. Lentils can be mixed with creamy ingredients to form an incredible base.
Chicken Dhansak for example, uses a sauce of red lentils, and while alone, they add enough body to a sauce, blending them to a paste after cooking creates a smooth sauce with lots of body and depth of flavour.
As we've mentioned, some Indian dishes use a cream-based curry sauce. Usually using a cream is combined with other thickening and flavour-adding ingredients, such as carmelized onions blended into a paste (or simply minced and clarified).
Again, the cream can come from actual dairy cream, coconut cream, a rich coconut milk.
Gordon Ramsey's "Curry in a Hurry" uses a perfectly-acceptable-though-not-typically-Indian winter squash sauce base. Squash is an incredible ingredient to use as a curry sauce base, especially when combined with coconut milk.
Add in the typical flavours of a winning Indian curry, and you'll have a restaurant-quality taste almost guaranteed.
Lend thickness and depth with ingredients like clarified onion/garlic, blended; squash puree; leeks; lentils (red, brown, or black).
Lend smoothness and creaminess with ingredients like cream; coconut milk, soaked, blended cashews; and non-dairy milks such as oat milk, and also, again, blended onion/garlic.
This sounds obvious, but use delicious ingredients to make a thick, smooth sauce base. A curry recipe almost always relies on at least some blended vegetables.
Use clarified, blended onions; blended tomatoes; Soaked, blended cashews; or boiled, blended squash. Each one of these will impart its own special flavour and texture.
If, for example, you've begun your dish with blended tomatoes, you'll have a sour sauce without much body until it's been cooked down a little.
The more it is cooked down, the more acidic it becomes, hence for sauces that rely on a tomato sauce or reduction, usually creamy or sweet ingredients are added.
Butter chicken, for example, offsets the sour flavour with a whole onion, cooked and blended, along with butter and cream whose creaminess cuts the acidity.
To take another example, a Thai red curry balances out the creamy peanut-base for the sauce with savoury and sour (fish sauce, and tamarind respectively.) We'll explain more about balancing curries below.
This step is easy. You may blend your curry sauce with a hand blender or an upright blender. We usually use a hand-blender.
When improvising a delicious curry sauce recipe, experience is important. For this reason, you should experiment with recipes that use ingredients you don't normally use, and that are a little outside your comfort zone.
You'll find that some recipes use ingredients that are cooked, then blended; ingredients that are toasted then ground, or just minced ingredients. The variety in preparation methods leads to a huge variety in sauce texture.
In all your authentic Indian food creation, bring it together by creating a mixture of flavour elements. In particular, you should have something creamy, something umami, something sour, and something sweet, along with a base of flavourful spices and seasonings.
Add sweet with clarified onions/garlic, 1 tablespoon of maple syrup, honey, or sugar, as well as sweeter-tasting vegetables like sweet potato and squash;
Add umami taste with garlic and ginger as well as onion fried in vegetable oil. You can also add to this dimension by using black salt (kala namak), as well as hing or asafoetida.
Vegetable or Chicken stock will also add umami, as well as the cooking juices of chicken, beef or lamb.
Add sour by using pureed tomatoes as a base. You can also use Amchoor (mango powder), or tamarind, both of which you will find at an Indian grocer, and which both contribute incredible flavour.
For creaminess, add coconut milk, yogurt, cream, or an oil of your choice.
Finally choose a host of spices that goes well with the Indian recipes you love. If you're not sure of what spices to use, look up recipes that use 5 or 6 whole spices in their ingredient list.
In North America, especially if you're dabbling with Indian recipes, the first gizmo you reach for to grind spices is a coffee grinder. The coffee grinder is fine for starters. It's essentially a spice grinder, although spice grinders usually have a little more horsepower than a coffee grinder. The reason for that is that some spices, such as cinnamon/cassia bark are difficult to grind.
A purpose-built grinder with two blade assemblies, one for wet, one for dry, is ideal.
How to: Check out our Garam Masala recipe, or Pumpkin Spice recipe
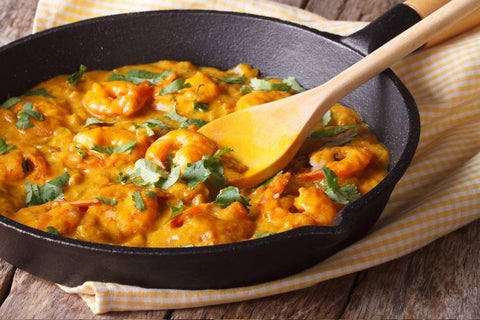
Coconut milk is a central ingredient to Indian food. Whether you're preparing a chicken, beef, or vegetarian curry recipe, being able to make a fantastic coconut curry recipe. The recipe below is a sure bet!
The above coconut curry recipe uses about a quarter of a cup of coconut milk per serving. But some recipes use up to a half cup per serving. The combination of ginger, onion, garlic, and tomato essentially provides the base for this curry.
Generally speaking you use a curry powder when you're making either a British or Asian style yellow curry. If you're still not loving the idea of using curry powder to cook a curry, we recommend checking out this article on the history of curry. Although Western yellow curry powder might feel inauthentic to some, actually it has a great history.
Also, we recommend visiting our own article on making a simple chicken curry at home, which takes you through four curry-making methods including one that uses that classic yellow curry powder.
Finally, there is also an Indian dish inspired by Western Curry. It's called "Murgh Kari," and it uses a variety of Indian cooking methods and Western yellow curry powder.
One thing that unites us all is that we all admire great food. Learning how to cook Indian dishes is one of the best ways to broaden your culinary horizons, expand your culinary culture and strengthen your bond with family and friends (within your bubble of course).
Recruit them to help you design the perfect curry sauce. So we recommend cooking with family and friend, even if there's only a few of them in your bubble right now.
Get your bubble together, get the ingredients together for a new Indian recipe you've never tried before, and tackle that project together. Alternately, you can focus on an entree while your partner, son, or daughter tackles the chutney or raita recipe.
It might sound a bit corny, but while you're there at the stove combining onions with coconut milk and ginger/garlic to create a dynamite curry sauce, simply having the happy presence of people in your family will make the food better, so long as you enjoy the company.
Learning even one of these methods will substantially improve your command over flavour. Please join us on facebook and instagram, visit our store.
]]>Some fenugreek leaves, and even some whole cumin or carom in the crust mix will make the crust look unique and help to send the message that this pie is something truly special.
1. 3 cups butter chicken (chicken pieces and gravy)
2. 1 small purple onion, large-diced
3. 1 cup half-inch diced potato
4. 3tbsp flour
5. 1/2 tsp salt
6. (optional) 1/2 tsp each: cumin, fenugreek leaves, paprika
7. (optional) 1/4 cup green peas
I made my butter chicken pot pie to freeze and give to a friend. It makes a great, unexpected gift. If you're going to bake right away, preheat your oven to 350 F. You'll need:
- a strainer,
- two mixing bowls,
- a small sauce pan,
- a greased 9" pie tin,
- a pastry blender,
- a rolling pin,
- and cup measures.
1. Get two cups of water boiling for your cup of potatoes
2. Over a mixing bowl, place your butter chicken and gravy in a coarse strainer: the kind you use to strain noodles (i.e., not a colander).
3. Place 2 cups flour, salt, fenugreek leaves, and shortening in another mixing bowl, and mix with pastry blender or a fork. You should be able to work these ingredients into a mixture of pea-sized pebbles, if it is too dusty, add a bit of shortening, and if it's sticking way to much add a bit of flour.
4. Add vinegar and 1/3 cup water to your pebble-sized flour mixture and see if you can get the whole thing into a dough ball. If you still have some mix that won't adhere, add just a little more water. It should self-adhere without being too sticky.
5. Place your potatoes in the boiling water, and boil for four minutes.
6. Dice your onion while the potatoes are boiling.
7. Strain your potatoes and set aside.
8. Add the 3 tbsp flour to your butter chicken gravy that has drained from your strainer, along with the salt, and other seasonings and whisk until mixed well.
9. Using your hand, shred the chicken and add it to the gravy.
10. Add your diced onion and par-boiled potatoes (and optional peas) to the gravy. Mix well
11. Divide your dough ball into two halves, one a little bit larger than the other.
12. flour all surfaces, including your hands and rolling pin, and roll out the bottom dough ball. Place bottom crust into a greased, floured 9" pie tin. (To move the crust from the countertop to the pan, I fold the rolled crust into quarters, then unfold it into the pan.)
13. Place your filling in the bottom crust, roll out the top crust, crimp, perforate, and bake at 350 for 1 hour.
]]>
In the package recipe, we substituted the urad dal for canned beans and lentils, which saves a huge amount of time without an appreciable loss in flavour, but if you want to make the completely authentic recipe, here is our package recipe with the authentic urad dal, and one or two little tweaks.
Where and How to Buy Urad Dal
Your town or city probably has an Indian grocer, and if so, that's the best place to find Urad Dal. There are a few mainstream grocery stores that stock it as well, so check your international aisle.
There are two kinds, one is whole and black, and the other has the husk removed and is split/white. For this recipe, get the black kind (pictured above).
If you cannot find it locally, It's pretty easy to find an online retailer in your country that can deliver it quickly. In Canada, try Singals.ca, or in the US, distacart.com.
1. 1 slightly rounded cup urad dal
2. Butter: 2 to 8 tbsp (if you're not watching calories, go all in)
3. Onion: 1 medium
4. Garlic 3 cloves (optional)
5. Ginger 1" piece, peeled (optional)
6. Tomatoes: 2 medium sized
7. Whipping cream 35%: 2 tbsp
8. Fresh Cilantro: 1 cup chopped
9. Salt to taste
Note: Regular coconut milk can be used as
whipping cream substitute
1. Rinse the Urad Dal and soak overnight in three cups of water, plus a teaspoon of baking soda (this will make it easier to boil your Dal the next day).
2. Dice the onion (1 medium) into small pieces. The smaller the better.
3. Grate your garlic and ginger using the small side of a box grater or a micro-plane style grater and set aside in a small bowl. (optional)
4. Roughly chop the fresh cilantro (1 cup) and dice the tomatoes (2 medium).
1. Start early by boiling your dal lentils, add one additional teaspoon baking soda to your boiling water, and boil on medium heat for 1-2 hours until dal can be easily mashed.*
2. In a pan, melt butter (2 tbsp) over medium heat and fry the diced onions, grated ginger and garlic until brown. (3 to 4 minutes)
3. Add SPICE PACK 1, diced tomatoes, salt (1/4 tsp recommended) and a handful of fresh cilantro leaves. Stir well for 1 minute.
4. Add the pre-rinsed lentils, kidney beans, warm water (1/2 cup)and bring it to a boil.
5. Turn down the heat to low and cook covered for 8 to 10 minutes. Stir occasionally
and add more water if needed.
6. Mix in SPICE PACK 2 and adjust the heat level to your liking by adding the hot chili pack.
Be Careful, this spice is HOT!!!
7. In a separate pan, melt butter (2 to 6 tbsp) over medium low heat and add in SPICE PACK 3.
8. Now add the melted spiced butter into the lentils and mix well to 2 minutes.
9. Garnish with whipping cream (2 tbsp) and fresh cilantro.
*If you have a pressure cooker or instapot, boiling the urad Dal will go much more quickly, you can find instructions in this recipe under Method:
]]>
My wife and I wanted to eat outside, it was a pretty hot summer day, and I was bored of most of our food options. I wanted something delicious, something cold, something that we hadn't eaten before. Not wanting to take the time to dredge the internet for a recipe that I may or may not have the ingredients for, I just sort of stood in front of the closed fridge wringing my brain. I decided I wanted diced tomatoes, and chopped red onion, along with some peppers, all uncooked, sort of like a pico de gallo. But I also had some coconut milk leftover, and I wanted to use it up quickly. That's where this recipe came from, and it's the best fusion dish I've ever made.
It uses a tart and creamy sauce made from lemon and coconut milk to coat the raw veggie ingredients. I originally wanted to serve it on bread, like a bruschetta, but my wife preferred cheese tortellini, and instead of chicken we used a chickenless substitute that worked out to be delicious. Here's how it came together:
For the sauce:
for the Pico de Gallo
For the protein
There are a few steps to this, but don't be intimidated, it comes together fast.
]]>
If you’re here, you’re looking for how to make a simple chicken curry at home, so we want to show you the simplest, most delicious methods we know.
Here are four ways to make an incredible chicken curry at home. We’ll start with an easy recipe for a classic North American yellow curry (method 1), then take a look at Master Indian’s spice kits (method 2), a more authentic simple North Indian chicken curry (method 3), and finally a recipe for Daiwahala chicken (method 4), one of the simplest and pleasing authentic recipes you will find.
If you live in the West, you might love yellow curry. To some people, a simple chicken curry means a classic comfort food yellow curry made with that yellow curry powder. If that's what you're here for then this recipe is for you. If you'd rather find a more Indian-style simple curry recipe, feel free to skip ahead to the next three methods. Here is a recipe for what your English-speaking grandparents knew as curry.
Ingredients:
1 medium onion; diced, grated, or blended in a food processor
½-3/4 cup yogurt, cream, or coconut milk
½ cup stock or water
1 rounded tsp corn starch
1.5 pounds chicken
1.5 tbsp yellow curry powder
1 tsp cumin
1 tsp garlic powder
1/2 tsp ginger powder
1 tsp coriander, 1 tsp oil
optional: dice ½ green pepper
optional: ½ teaspoon cayenne pepper
salt to taste
Preparation:
Dice, shred or blend your onion.
Process:
We've found most home cooks in North America cook either the yellow curry, or if they're looking for authentic Indian, they use a bottled sauce of either madras, butter chicken, korma, or whatever. The problem is that the bottling process takes tremendous heat, wiping out many of the subtle flavours.
Kits like Master Indian's are simple: you open one of their kits, and you find four pre-mixed spice blends to add at different stages. Essentially you’ve been given the makings of an authentic from-scratch restaurant recipe, minus what you probably already have in your kitchen, or can easily find at the grocery store.
This photo is Master Indian’s butter chicken, (a.k.a., murgh makhani). See the four spoons on the side? Those contain the four spice blends that come in the spice kit, and because you add them at different stages of the cooking process, you’ll be cooking curry the traditional way. I cook with these about once or sometimes twice a week. They save time and virtually guarantee a restaurant-quality result. They’ve also made me a far wiser Indian cook by demonstrating to me first-hand how authentic Indian food is really prepared.
Master Indian’s chicken curry spice kits come in eight different varieties: there are classic chicken curries: chicken korma, chicken vindaloo, butter chicken, chicken tikka masala, madras chicken. There’s also a taarka dal and an aloo gobi kit.
A step-by-step kit is the easiest way to make a restaurant-quality curry at home.
Now that we've covered the easier side, here is a simple from-scratch chicken curry recipe like what you will find in Northern India, especially the in the state of Punjab. This is the kind of curry we make most often. We’ve used common North American ingredients and spices, but we’ll advise you that the sooner you can get to an Indian grocer and stock up on the essential Indian whole spices, the more flexibility and versatility you will discover, the better your spiced dishes will turn out. There’s nothing quite like the fragrance of freshly-pounded nutmeg, briefly toasted, then blended into a creamy coconut curry sauce along with whole cumin, cinnamon and other aromatic whole spices.
Ingredients:
2 lb chicken
¼ cup yogurt
2 tsp turmeric, divided
2 tbsp oil or butter
1 tbsp cumin
1 tbsp coriander
1 tsp nutmeg
1 tsp cardamom
½ tsp cloves
1 inch piece ginger, minced
6-10 garlic cloves, minced
Two medium onions, fine diced or minced
Two medium tomatoes, cored, fine-diced
1 tsp garam masala (optional)
Salt and pepper to taste
1-3 (not 13!) tsp cayenne pepper or Indian red chili (optional)
1.5 cup coffee cream or coconut milk (you can use full-fat cream if you’re feeling care-free)
Preparation:
Process:
Though more involved, this Punjabi-style curry is still one of the simpler from-scratch recipes. All of the recipes here go extremely well with basmati rice, but I like to serve this recipe with some toasted naan or paratha.
The final method we're considering is this recipe for Chicken Daiwahala (click here or the image above to proceed to the recipe.)
We include this recipe because you're likely to have all the ingredients, and also it is an incredibly simple, lightly-spiced, authentic curry. One of the most delicious and certainly one of the easiest recipes, and one of the best yogurt-based gravies you can find.
Though simple, it still contains some of the essential elements and methods of traditional Indian cooking. This sauce method works great for preparations of tofu, and since it's quite a simple sauce, it works as a remarkable base with which to conduct your own flavour experiments.
If you have made it this far, then you're likely ready to venture forth in your kitchen and try something new and delicious! Good luck to you! Please contact us on Master Indian Spice's facebook page, or instagram page. And also if you ever have any questions, feel free to post them here or directly to us in an email. Time to get cooking!
]]>
These 31 curries represent some of the favourite curry recipes of the Master Indian Spice family. We've given them a brief description and listed the key ingredients as well as any special ingredients (ingredients Westerners likely do not have, and ones that aren't on our list of 24 top Indian spices) This list will introduce you to some of the highlights of Indian and South Asian cuisine.
Now without further ado: the curries!
https://www.yummytummyaarthi.com/rajasthani-laal-maas-recipe-red-mutton/
Description: Laal Maas is a Rajasthani delicacy defined by its smoky flavour (many of the recipes call for dhungar, or smoking the dish at the end by placing a smouldering coal in a dish on top of the simmering meal, and covering it for 10-15 minutes while the smoke infuses.) It is a hot dish defined by a gravy colored by dry, ground rajasthani peppers, which also contribute to the the smoky flavour of the dish. A special ingredient is bittersweet kachri powder, a species of cucumber that grows in Rajasthan.
Key Ingredients:
Lamb
aromatic spices
red chilies
Special Ingredients:
Rajasthani Peppers (or paprika from rajasthani peppers)
dhungar
Kachri Powder
http://www.myfoodmill.in/recipe/varutharacha-chicken-curry/
Description: In Malabar, there is a tradition of cooking chicken with a gravy made of a good, heaping quantity of toasted coconut, along with lengthy list of aromatic spices. For people living in Kerala, especially coastal Kerala (in the region sometimes known as Malabar), this is an essential comfort food that comes from a long tradition
Key Ingredients:
Chicken
Coconut
https://www.ihearteating.com/chicken-massaman-curry/
Description: Massaman is a thai chicken curry of Muslim origin. Its name means sour, and it's one of the most popular curry dishes from the thailand. Generally the protein is chicken, and although you can make the massaman curry paste yourself, popular recipes usually use a pre-packaged paste.
Key Ingredients:
chicken
coconut milk
potatoes
roasted peanuts or cashews
Special Ingredients:
Massaman curry paste
tamarind
fish sauce
https://www.whiskaffair.com/kerala-crab-curry-njandu-curry/
Description: Njandu curry is a Keralan crab curry, bursting with flavour and spice. One of the special ingredients in this curry is Garcinia, also known as Keralan Tamarind, a sour fruit used almost exclusively in south Indian fish dishes.
Key Ingredients:
crab
coconut
green chilies
Special Ingredients:
Kudampuli or Garcinia
https://myfoodstory.com/goan-prawn-curry-recipe/
Description: The small Indian state of Goa is renowned for its fish curries. You often find these curries contain toddy vinegar (a vinegar of coconut milk that browns as it ages). This incredible dish calls for a lot of coconut and sours with tamarind, which you can find at any Asian or South Asian grocer.
Key Ingredients:
prawns
kashmiri chilies (or lal mirch powder)
coconut milk
Special Ingredients:
tamarind paste
https://www.recipetineats.com/beef-rendang/
Description: Beef rendang is an incredible Malaysian stewed authentic beef curry, using red chilies as the primary flavouring in the sauce. The gravy is comprised of a satsifying array of aromatic spices including some distinctly Malaysian ingredients, such as galangal, kaffir lime leaves, and lemongrass. This particular recipe is quite traditional and delicious in the extreme.
Key Ingredients:
chuck steak
red chilies
Special Ingredients:
kaffir lime leaves
tamarind
lemongrass
galangal
https://www.thetakeiteasychef.com/chicken-xacuti-recipe
Description: Chicken Xacuti uses a broad range of spices including poppyseed, sesame, dry chilies, turmeric, coriander, fennel, fenugreek, and other aromatics finishing off with a little nutmeg. Depending on the peppers you use, this dish can be made quite mild, and it's still bursting with a beautiful flavour that complements this west Indian chicken curry perfectly.
Key Ingredients:
chicken
coconut
poppy/sesame seeds
https://www.bigfattummy.com/2018/11/beef-aad-maas/
https://www.bbcgoodfood.com/recipes/railway-lamb-curry
Description: Starting with the Madras Railway company, India has a long history of Rail. Railroad culture in India, like the culture of any Indian state, developed its own unique culinary strain. This relatively simple curry, served up with paratha or naan, is representative of the kind originally developed for rail workers, and now served as a specialty dish all over India
Key Ingredients:
Lamb
garlic
potatoes
Special Ingredients:
tamarind
https://www.whiskaffair.com/bhuna-goshth
Description: A luxurious preparation of mutton or another red meat, bhuna ghosht comes from the ancient tradition of Bhuna curries, slow-cooked stewed dishes that date back thousands of years. Essential fare for a large Indian dinner.
Key Ingredients:
Lamb
Onion
Special Ingredients:
Mustard oil
Tamarind
https://www.thespruceeats.com/thai-panang-curry-recipe-3217463
Description: Panang is a Thai/Cambodian curry, and its flavour is lively and distinct. The Thai basil along with lemongrass, kaffir lime and sometimes bamboo shoots, provides a delightful counterpoint to many of the Indian recipes we've been
Key Ingredients:
chicken
tomato paste
soy sauce
Special Ingredients:
Kaffir lime leaves
galangal
basil or thai basil
http://theyellowdaal.com/chicken-cafreal/
Description: Of all Indian chicken curries this is one of brightest and liveliest. The flavouring of this dish comes from cafreal masala, which is a paste made out of aromatic spices, primarily cilantro (coriander leaf). If you don't like cilantro, maybe this is a dish to avoid. If you do like it, you must try cafreal, which is perhaps the liveliest authentic Indian chicken curry there is.
Key Ingredients:
chicken
cilantro
green chilies
https://www.whiskaffair.com/alleppey-fish-curry/
Description: This is an incredibly pleasant sweet and sour curry, particularly popular in coastal Kerala. With a sweetness and aroma imparted by raw mango, joins tempered mustard seed and aromatic spices for an unforgettable dish. The addition of red chili, turmeric, tomato and coconut milk gives this dish a particularly vibrant hue.
Key Ingredients:
fish (cod, sole, tilapia, salmon or trout are great choices for this curry)
tomato
coconut milk
Special Ingredients:
raw mango
https://www.masterindian.com/blogs/master-indian-spice-blog/chana-makhani-creamy-chickpea-curry
Description: This chana makhani curry was put together by our staff. Though this recipe is on noodles, chana (chickpea dishes) go extremely well with naan. This is a punjabi-style gravy, consisting mainly of tomato and onion with a delicious assortment of toasted spices. (If you enjoy a creamier curry, nothing beats Master Indian's butter chicken spice kit.)
.
Key Ingredients:
chickpeas
tomato
onion
https://www.masterindian.com/blogs/master-indian-spice-blog/vegan-curry-pasta-shells
Description: Sometimes a cultural fusion is as exciting as a traditional dish. This recipe was inspired by a restaurant whose curried pasta shells are a local favourite in Fredericton, where Master Indian got its start. The meat mixture inside the shells is flavoured essentially with Madras masala, and the sauce is simply a mixture of coconut cream, cumin and turmeric. (If the spice list in this recipe is a little daunting to you, preparing the ground meat with Master Indian's madras spice kit will save you time and ensure a perfect filling.)
Key Ingredients:
tofu
Jumbo pasta shells
Special Ingredients:
https://cookpad.com/ke/recipes/2613506-kolhapuri-chicken-curry
Description: Kohlapuri is a rich dish from the western state of Maharashtra. Similar in preparation to Varutharacha chicken, this dish includes a distinctly Maharashtran flavour along with sesame and poppyseed toasted and ground. This is a renowned and must-try west indian chicken curry.
Key Ingredients:
chicken
roasted coconut
sesame, poppy seeds
https://recipes.timesofindia.com/recipes/mutton-sukha/rs53823731.cms
Description: Sukha beef curry or sukha mutton curry is an Indian red meat curry with a relatively simple preparation. Sukha dishes are common in the southern state of Karnataka. Sukha means semi-dry, and sukha dishes pack a tremendous amount of flavour into a meat dish without a lot of gravy. If you're looking for an authentic Indian beef curry, any of the mutton recipes in this list will serve perfectly for a preparation of beef.
Key Ingredients:
mutton
tomatoes
onion
https://tasteasianfood.com/chicken-varuval/
Description: Varuval chicken is a curry from Southern India in the state of Tamil Nadu. This particular recipe includes a method for a garam masala ("masala powder") heavier on cinnamon, cardamom, and cloves, lighter on cumin. What really sets this tamil recipe apart, however, is the marinade which uses the famous south Indian "meat masala"
Key Ingredients:
chicken
black pepper
Special Ingredients:
Meat Masala, or meat curry powder
https://www.jinooskitchen.com/muttai-kulambu-recipe/
Description: Egg curries are more popular than you think. In this recipe from Tamil Nadu, three eggs are treated to a bath of incredible gravy of tomatoes, onions, shallots, and aromatic spices.
Key Ingredients:
egg
shallots
onion
tomato
Special Ingredients:
tamarind
https://www.thespruceeats.com/chicken-dopiaza-recipe-1957361
Description: The word dopiaza stands for "two onions". Thus what distinguishes this dish is mainly the method of preparation. Onions are used as a gravy base as well as one of the dish's vegetables. The dish is popular in Northern India.
Key Ingredients:
chicken
onions
tomatoes
https://glebekitchen.com/chicken-dhansak-bengali-style/
Description: There are many ways to thicken a sauce. Making Indian sauces in all their varieties keeps you on your toes and entertained when in the kitchen. If you can make a dal, and if you can make a chicken curry, then you can make a dhansak, one of the most delicious authentic Bengali chicken curries. Most recipes don't include this step, but we always rinse the dal to take out some of the saponins.
Key Ingredients:
chicken
red or brown lentils
tomatoes
Special Ingredients:
Panch Phoran or Indian Five Spice Blend
https://swatisani.net/kitchen/recipe/chicken-chettinad-a-chicken-dish-from-tamil-nadu/
Description: Chettinad is a region in Tamil Nadu famous for its cuisines. This particular recipe of Chicken Chettinad is very similar to some of the other chicken dishes in this list, but the chicken is cooked for a long period over low flame in the tomatoes (of which there are plenty). The dish is finished off with a little lemon. These regional variances on the same culinary themes may seem repetitive, however when you experience the dishes for yourself, you will discover just how significant subtle shifts in cooking method and regional ingredients will change a dish.
Key Ingredients:
chicken
tomatoes
onion
fresh grated coconut
https://food.ndtv.com/recipe-gujarati-kadhi-98977
Description: This is a controversial inclusion. Kadhi is not quite a curry. The curry, by definition, is some food item served up with a sauce. It could be any food item, but if its served up with a sauce containing spices, particularly if those spices are Indian, then it's a curry. Kadhi is more of a soup, but it's so delicious and distinct, that we would be doing you a disservice to leave it out. Essentially it is a soup of yogurt, gram flour, water, and savoury herbs.
Special note: Although this recipe calls for asafoetida delivered straight into the broth, we would recommend tempering it along with the other spices to moderate it and take the edge off it.
Key Ingredients:
yogurt
water
Special Ingredients:
gram flour
https://www.sangskitchen.com/andhra-kodi-kura/
Description: This is a special chicken curry that uses a gravy of soaked, blended cashews and poppyseeds, as well as a good amount of lemon juice. A most re
Key Ingredients:
chicken
coconut milk
potatoes
roasted peanuts or cashews
https://www.yummyoyummy.com/2012/12/nadan-kozhi-curry.html
Description: The Nadan Kozhi is on the simpler side of chicken curries. A classic Indian curry easy to make at home, this dish is quintessential and simple.
Key Ingredients:
chicken
tomatoes
https://kalimirchbysmita.com/mutton-curry-a-delicacy-from-uttar-pradesh-bhojpur-cuisine-2/
Description: Of all the mutton curries we've talked about in this list, this specialty from Bihar and uttar-pradesh is one of the sauciest; we are speaking both figuratively and literally. This dish is particularly heavy on the garlic, and that's just fine with us. Garlic makes it good. For most 4-person curries, we'll use 6-8. This recipe uses 12-15 cloves. It is a very traditional recipe from uttar pradesh, well worth trying. You may get hooked on adding a whole lot more garlic to your curries. And that's ok!
Key Ingredients:
mutton
onion
garlic
https://www.yummyoyummy.com/2018/06/pineapple-pulisseri.html
Description: Just reading the ingredient list will have your mouth watering, and puckering up. This lip-smacking delicious pineapple curry is something totally unique that will blow your tastebuds to smithereens. Perhaps this goes without saying, but fresh pineapple only.
Key Ingredients:
Pineapple
yogurt
Special Ingredients:
jaggery (can be substituted for brown sugar)
https://www.archanaskitchen.com/kerala-olan-coconut-milk-vegetable-stew
Description: Pumpkin, and black eyed beans, Olan is essentially a coconut vegetable stew. In this recipe, you add the coconut oil at the very end, preserving its natural sweetness, and simmer the chilies and curry leaves to release their flavour. An excellent main dish, and refreshing side-dish.
Key Ingredients:
pumpkin (preferably white pumpkin/ash gourd)
black eyed beans
coconut milk
Special Ingredients:
white pumpkin/ash gourd
https://www.whiskaffair.com/matar-paneer-recipe/
Description: What makes this unique is the combination of green peas and paneer. If you haven't tried paneer, you can think of it as a mild cottage cheese, pressed and made firm so that it can be cut into cubes like Tofu. The combinatino of paneer and green peas compliment each other beautifully in this North Indian delicacy.
Key Ingredients:
Paneer
onion
tomato
green peas
https://maayeka.com/2012/11/nadru-yakhni-lotus-steams.html
Description: Yakhni curry is a variety of Kashmiri curry that uses yogurt (many Kashmiri dishes use yogurt) as a sauce base. Yakhni can be served alongside rice, and the main proteins in it can be lamb or chicken. This particular recipe, however is a vegetarian variant that uses lotus root, and looks absolutely delicious
Key Ingredients:
lotus stem
Yogurt
Special Ingredients:
lotus stem
shahi jeera
Description: Patiala chicken curry is our favourite chicken curry of all time.The balance of aromatic spices in this dish is unmatched. There are a few variations on the recipe, as with all Indian curries. Try it yourself with our Patiala cooking kit that walks you through the traditional method.
Key Ingredients:
chicken
tomato
onion
If you've gotten to the end of this, bravo. Our recommendation for you is to pick a reasonably challenging dish, get the special ingredients, and forge boldly into uncharted territory. Cooking in this way is an incredible learning experience. Our second recommendation is - if you want the same learning experience you'd get with from-scratch cooking, but with the convenience of a cook-at-home kit - buy a handful of our spice kits!
]]>You can try this dish with chicken or beef. It's a Keralan-style gravy with the protein marinaded in a Sichuanese ingredient known as tian mian jiang or sweet-flour-sauce, which unlike its name suggests has a salty, malty flavour that hits some incredible savoury notes. Since my family is vegetarian, we did Tofu. Let's get this started!
For the marinade:
- ~ 1 lb protein of your choice (I used medium or firm tofu, cubed)
- 3 tbsp sweet flour sauce (<em>tian mian jiang</em>)
- 2 tbsp chinkiang vinegar
- 2 diced cloves garlic
- 1/4 cup flour (to be set aside)
For the curry paste:
- 1 large tomato, diced
- 1 medium onion, diced
- 1/2 cup coconut milk
- 1/2 cup yogurt
- 1/2 tsp turmeric
- 1 tsp crushed red chilies or Indian red chili powder
3. Transfer the paste ingredients to a blender with 3-5tbsp water, and blend until smooth.
4. In the same pan, fry onions on medium-high until transparent, add diced tomato and curry paste.
5. In a wok, heat 1/2 or 1 cup oil over high heat.
6. Add flour to marinading protein and coat by tossing. Add extra flour when needed.
7. When one piece of tofu or meat sizzles vigorously in the oil, then the oil is ready; add the rest of the coated meat to the pan, turning the pieces infrequently to crisp and brown on all sides (about 10 minutes).
8. Once the onion/tomato mixture has cooked a little, add the rest of your sauce ingredients and simmer until the sauce reaches the desired texture.
9. Serve over rice or with naan or paratha. This is a delicious fusion dish, and you will likely find that having a sweet sauce, such as Tamarind Chutney on hand will balance out the tofu beautifully. When we ate this at our home, we wound up mixing the sauce, tofu and tamarind chutney together and ate it with rice and toasted naan.
If you tried this and enjoyed it, please join us on facebook, and share your results!
Here, we present a simple, eight-ingredient, recipe of garam spices. "Garam" means “warming.” Garam masala is thus a mixture of spices that warms the body. We’re big advocates of storing spices in a sealed, glass container. This 8-ingredient recipe will give you enough masala to fill a 250 ml mason jar.
This part is open to interpretation. There are so many varieties of garam masala. These 8 ingredients, however, are generally found in all garam masalas. The following recipe produces a balanced, yet aromatic, easy garam masala.
Optional:
It’s okay if you just want to take pre-ground spices and mix them. But grinding them fresh and then mixing will multiply the quality and intensity of the flavours by orders of magnitude. Cinnamon, for example, when freshly ground, bursts with aromas and undertones of vanilla, which fade over time.
Many traditional Indian chefs will toast the spices before grinding. 2-3 minutes on medium heat in a pre-heated pan should be enough. You want the spices to be fragrant but not scorching. Then simply set aside and, once they have cooled, grind.
Now that you've gone through the process of grinding your own garam masala, (or perhaps you've just mixed it) try it against the store-bought garam masala. You can be guaranteed that a fresh ground garam masala will pack in tons of extra flavour. Even an easy garam masala recipe such as this will still be much livelier and more complex than most store-bought garam masalas.
As always, If you have a go at making this, link up with us on facebook and let us know how you made out. www.facebook.com/masterindianspice
]]>When you get a little tired of the common savoury herbs: thyme, oregano, basil and so forth, you may think to experiment with tarragon and marjoram, but if you're anything like us, you'll find these flavours more puzzling than interesting. Instead, let's give you another option: there is a fragrant savoury herb used throughout India, the Middle East, including Egypt, Iran, Pakistan and also parts of Asia: Fenugreek (Methi). Some describe the flavour as a combination of celery and fennel, but in fact it's subtly bitter flavour which does have notes of celery is incredibly nuanced, including notes of maple strong enough that sometimes it is used to create a mock maple flavour.
Fenugreek is an anti-inflammatory herb. Both the seeds and leaves are used in cooking. They contain vitaminss A, B6, and C, folic acid, riboflavin, niacin, thiamin, as well as important minerals such as copper, potassium, calcium, iron, manganese, magnesium selenium, and zinc.
Do you have a week? Fenugreek interesects so much of Middle Eastern and Indian cuisine, a genuine how-to on their use could populate a blog for years, however there are some guidelines that will help you navigate using this spice.
1. Watch out for the bitterness: Since there is a bitter element to fenugreek leaves, it's best to use them in slight moderation. We generally use about a tablespoon in 4-6 serving recipes. In dishes such as Aloo Methi, a side-dish where fenugreek leaves are a main ingredient, we've used a quarter cup for that amount of servings.
2. Counterbalance the flavour of fenugreek leaves with any of the following ingredients: cumin, black pepper, lemon, coriander, garlic, ginger, amchoor.
3. Do not temper or fry fenugreek leaves on their own. Instead, use these as you would use any savoury herbs to add to sauces and soups, and let the unique flavour infuse for at least 20 minutes.
4. As with all spices, store fenugreek leaves in an airtight container.
There are so many delicious recipes with fenugreek leaves. One of our favourites is Methi Matar, which is an incredible, creamy combination of garlic, onion, peas, potatoes, and many delicious aromatic herbs.
Generally speaking, you can use fenugreek leaves in most recipes, however here are a selected few:
You can of course buy Fenugreek Leaves online. If this is not an option, or if you like to shop local, you can find fenugreek leaves at your local Indian Grocer. You should consider trying fresh Fenugreek leaves, which you can grow from the seeds which are also sold wherever you can find dried fenugreek leaves.
]]>After talking it over a little, we decided to use all the Indian dessert spices, and tested the amounts of each. We came up with a recipe that is true to the original character of pumpkin pie spice, but that has a delightfully complex twist that no other pumpkin pie spice can match. A truly unique, Indian-style pumpkin pie masala.
Here is our recipe:
In India spices are typically kept whole and ground as needed. To get all these ingredients, you'll likely need to visit an Indian grocery store. The only thing they likely won't have is whole allspice, which you can find pretty much anywhere else. Using whole spices is an essential part of this process.
- 2 whole nutmegs
- 1 blade of dried mace
- 1 heaping tablespoon whole cloves
- 1 heaping tablespoon whole allspice
- 1-2 average-sized tej patta or Indian bay leaf (about 1/4 tsp, ground)
- 10-12 cinnamon quills (about 20 grams, or a similar quantity of cassia bark), smashed.
- 1 rounded tbsp fresh ground ginger.
- 1 whole green cardamom pod
Here is where it gets fun.
1. Heat a frying pan to medium heat.
2. Add mace, cloves, tej patta, cardamom, and about half your cinnamon quills (or cassia bark), to the pan. You'll want to toast these for 1-2 minutes until they are fragrant, but not burning. Spices should just begin to darken (when the tej patta browns just slightly, you may remove all spices) Set these ingredients aside.
3. By now your kitchen should smell amazing. Grate your nutmeg using a rasp or a grater.
4. When that's done, you're ready to add your toasted and untoasted spices to the grinder (a coffee grinder will do in a pinch, but you may have to grind the spices piecemeal and mix them afterward).
That's it! Now you've got about an exceptionally strong, impressively-flavoured pumpkin pie spice that will impress and delight the pumpkin pie spice lovers in your life. You may want to use 1/2 or 2/3 the amount of what you would normally use for pumpkin pie spice. Even fresh out of the clubhouse container, the pre-ground, pre-blended spice can lose significant flavour.
We'd love it if you joined us on our facebook page and let us know what you thought of this recipe. If you want to learn a little more about how we arrived at the recipe, read on.
What brought this recipe together is a knowledge of the origin and flavour profiles of the many spices used in this recipe, and the other typically complimentary flavours of the new spices we introduced into the recipe. Pumpkin pie spice is a combination of mainly cinnamon, ginger, cloves, and allspice. Cloves and allspice both contain eugenol and have a similar properties, which is why a lot of pumpkin pie spice recipes use both. Toasting the cloves and other spices cooks the volatile oils, slightly altering their character. What you lose through flavour intensity through this process, you gain in character.
Mace and Nutmeg are related spices because they are a part of the same fruit, and contain most of the same alkaloids. Mace is sweeter, but also muskier and more complex. We found splitting the nutmeg and mace evenly in this recipe took it too far from the original recipe, but that the mace worked extremely well as an accent, especially toasted.
We've used two sources of cinnamon flavour, the first is the bark which can come in the form of quills or the unaltered dried bark of cinnamomum cassia, and the second is the leaf, which has a bitter, bay-like flavour. The toasted leaf (known as Indian Bay) brings a slightly bitter note that nonetheless blends perfectly with the rest of this spice mix.
Finally, a cardamom pod gives that lively kick that goes so well with deserts, like apples and pears. We're using one pod, so it doesn't overwhelm the rest of the spice mix.
If you're interested in finding out more about how to make delicious Indian food and work with spices, we have an excellent guide on cooking authentic Indian food at home, as well as a blog post on the top 24 Indian Spices on our website. Hit up our facebook page and let us know what you thought of this recipe.
]]>
This dish teaches a specific spice skill, and, even better, a knowledge of Maharashtrian spice mixes that combine aromatic spices with nuttier seeds such as sesame, coconut and poppyseeds, which lend not only nutty richness, but also act as a thickening agent for a hearty, satisfying sauce. A familiarity with this spice mix will help making authentic Indian food at home much more interesting by preparing you for making dishes such as Kohlapuri Chicken, or Tambda Rassa.
The skill of toasting spices until fragrant is especially useful if you're looking to make recipes that don't use so much cooking oil. Try this West Indian Spiced Squash Soup recipe for an easy introduction to the world of central Maharashtrian flavours.
Roasting whole spices then grinding them is easy, but the flavour that emerges from this simple process is bold, complex and tastes incredible, and that's the process that makes this dish special (and a blast to make and finish). This West Indian spiced squash soup is a fusion of a Canadian fall favourite and a spice mixture from the Western part of India, specifically Maharashtra.
2 medium onions, diced
2-3 medium tomatoes, cored and diced
1-2 tbsp ginger, minced
6-8 cloves garlic, minced
5-6 cups cubed butternut squash
Juice of 1/2 lemon
4 cups vegetable stock
2-3 tbsp vegan butter or cooking oil
2 tbsp garam masala
2 tbsp paprika
1 large cortland or other sour apple, diced
salt to taste
1/2 tbsp nutmeg
6-10 cloves
3 tbsp coriander seeds
2 inch piece of a cinnamon stick
8 green cardamom pods, smashed
10 black peppercorns
2 tbsp cumin
1/4 cup dried coconut
1.5 tbsp sesame seeds
2 tbsp poppy seeds (you can substitute with other nuts)
3-4 dried red chilies
1. In a large pot on medium-high heat, heat the nutmeg, cloves, coriander, cinnamon (or cassia) cardamom and peppercorns until slightly golden and fragrant. If you pre-heat the pan, this should take around a minute. Stir them so they do not burn.
2. Now add the cumin, coconut, sesame seeds, poppy seeds, and dried red chilies. Toast until browned and fragrant, stirring to prevent burning. Set aside the spice mix and spread them out on parchment or a baking sheet to let them cool off.
3. Melt the butter in the pot (if you have some hing on hand, go ahead and add a half teaspoon or so to the butter now), and add the onions, garlic, and ginger, cook on medium heat for about 2 minutes until transparent, add your garam masala and cook for another 1 minute.
4. Grind your toasted spices in a coffee or spice grinder, add these to your onions.
5. Now add your butternut squash, diced apple and vegetable stock. For a creamier soup, you can use oat milk (it's the best).
6. Depending on tartness you may want to add more or less lemon juice. The apple adds both sweetness and tartness. Salt and spice to taste. Cayenne or Indian red chili powder will both work if you want to make it hotter.
7. Water as needed to create a proper soup consistency
8. Serve! Garnish with fenugreek (methi) leaves, other herbs, or green onion along with a small dallop of butter.
]]>Amchoor is a bigtime flavour enhancer in Indian cuisine. It is essentially unripe green mango that has been dried and powdered. Typically amchoor is used as a source of sourness, such as lemon or tamarind, but amchoor also retains some of the sweetness of mango. Knowing how to use amchoor in a variety of cooking contexts is an important skill to have if you want to make authentic Indian food at home. It also comes in handy for Many western cooking application, and comes in extremely handy during those times when you're all out of fresh lemon.
In Indian cooking amchoor is a souring agent. Since it is highly concentrated, and contains significant quantities of mainly malic and citric acid, it's easy to overdo it. To give you an idea of how much to use, consider that by volume, amchoor is about five times as sour as lemon or lime juice. For a recipe calling for a quarter cup of lemon juice, just under a tablespoon of amchoor will do.
Most of the time, you'll see amchoor added to an Indian sauce nearer the end of the cooking process, though occasionally you will find a recipe wherein the amchoor is fried along with the spices in oil just prior to adding onions to the pan, which carmelizes the sugars in the amchoor, and may make a small flavour difference. We have tried it both ways, and we still prefer the simpler process of adding it later when there are more wet ingredients to mix it into.
Acidic ingredients are essential in a marinade, which is why amchoor can come in handy as a primary acid in a marinade. Amchoor along with a balanced spice blend and some minced garlic or onion will tenderize and flavour a meat or tofu. You can try the following as a base:
2 tbsp amchoor
4 cloves garlic minced
1/2 tsp salt
1/2 tsp turmeric
1" piece ginger, minced
1/4 cup olive or canola oil
Like all sugary powders, amchoor tends to clump. For this reason it's best to get it into a sealed container as soon as you buy it. In the Canadian climate, and in most climates, humidity varies wildly between seasons.
If your amchoor does clump, we recommend against softening it up with an apple or a clay disk since it's best to keep it as dry as possible. Usually it's easy enough to break the clumps by hand, and you can always get the help of your coffee or spice grinder.
Amchoor is an essential Indian ingredient. Once you know how to use amchoor and you get into the habit of using it, you'll have a whole new flavour at your disposal. For most Indian dishes, a little hint of amchoor will add a pleasant tang, and since it is a quintessential Indian spice, the flavour will taste all the more authentic. If you have been making Indian food at home with our cooking kits or from scratch, then we recommend giving Amchoor a try from time to time. Get to know it, and we're sure you'll have a new best flavour friend in your home kitchen.
]]>At Master Indian Spice, we love all manner of seeds, leaves, and roots, and we're always on the lookout for something new and delicious. Well it turns out that one of the most intriguing, and delicately flavoured culinary ingredients might be growing right in your back yard.
It's late summer now, and although the weather is cooler, you still have time to forage for it. Impatiens capensis, or orange jewel weed, also known as spotted touch-me-not, is a plant you may know of from childhood. When touched, the mature seed pods explode, scattering seeds in all directions. While the exploding pods are great fun for kids (and childish adults), what you may not know are that its blossoms and seeds are edible. Not only are they edible, but they are visually quite striking. The blossom is an orange spotted snap-dragon type flower, and the seeds are a gorgeous lime green.
They taste quite a lot like walnuts. They are mildly bitter, with a sweet and nutty undertone. Their mild flavour is distinctive and noticeable, and coupled with their striking green colour it makes an inticing wild-foraged ingredient.
It's best to harvest the pods after there has been some still, dry weather. Both rain and wind will cause mature pods to explode. Picking is tricky. If you touch the pod with a knuckle or a fingertip, you will likely lose the seeds, so the best approach to picking is to trap the pod between thumb, index, and middle finger.
We found it is fastest to pick the pods, place them in a bowl, and then separate the seeds from the pieces of sprung pod after you've finished picking.
It took about 10 minutes to get a tablespoon's worth of seeds, although an enterprising forager may be able to scale the harvesting by wrapping the plants in a large mesh bag and gently shaking them. It would be a tricky process, since the shaking could set off pods on other plants but with care it could be done.
When we tasted jewel weed seeds for the first time, we got very excited that they could be used in cooking. Since their flavour is not assertive, we decided to try them in a mild vinaigrette. We learned a few tips along the journey which we'll share after the recipe.
2 tbsp jewel weed seeds
1 tsp garlic powder or 2 tsp grated or mashed fresh garlic
2 tbsp rice or apple cider vinaigre
1-2 tbsp vegan silk coffee cream (or mayo)
1/2 cup olive oil
1. After harvesting the seeds and sorting them from the pods, place them in a medium mixing bowl, and cover with vinaigre.
2. Add the garlic powder and silk vegan coffee cream (to give the dressing a lighter colour and milder flavour)
3.With a small whisk, mix briskly and slowly pour your 1/2 cup of olive oil into the dressing. Thanks to the garlic, your dressing should combine without much separation.
4. Serve and enjoy.
With no fast method available of removing the seeds from the pods, probably this seed will remain a novelty: a late-summer special ingredient or garnish. Still, the curious colour and the striking walnut flavour makes foraging for them well worth it.
We learned from our own harvesting that the seeds oxidize quickly, like avocado which spoils their appearance somewhat. Their flavour is best when they're still fresh out of the pod. You can prevent the oxidization by putting them in vinaigre or lemon juice, but this can also overwhelm their flavour.
Though we have not tried them in baking, they would fare well in a banana bread as a substitute for the walnut pieces. They would brown in the oven, but that wouldn't stop us from using them in and on top of a banana bread, where their presence would be sure to spark curiosity. It may be that the culinary uses of Jewel Weed are slightly limited, but from now on every July, we'll be making a point of foraging for them and trying them out in new recipes.
]]>2 cups potatoes, large dice (about 3/4")
3-4 cloves garlic, fine diced
1/2 small onion, fine diced
1 tsp lemon juice
2-3 tbsp butter or vegan butter
3 tbsp fenugreek leaves (kasoori methi)
salt and pepper to taste
1. Boil your large-diced potatoes in water for 4 minutes. Drain, rinse and let dry.
2. While your potatoes are drying, heat a pan or skillet on high heat, and melt your 2-3 tbsp (we used 3.5 tbsp) of butter.
3. While butter is melting, fine dice your half onion and garlic cloves.
4. Once your butter is hot and sizzling, add your dry potatoes to the skillet or pan, tossing carefully or stirring to coat the potatoes.
5. Fry the potatoes at high heat, toss carefully or turn with a spatula every 1-2 minutes, allowing them to brown, and watching that they don't burn.
6. Add your diced garlic, onion, and methi or fenugreek leaves, fry for 30 seconds to one minute.
7. Sprinkle your one tsp lemon juice, and toss to coat in the pan. Salt and pepper to taste. Garnish with methi leaves or green onion.
8. Serve.
9. Devour.
]]>
2 packs of NuPasta fettuccini
1 14 oz can chickpeas, drained rinsed
1 cup diced potatoes
2 medium onions, fine diced
3-5 cloves garlic, minced
1-2" piece of ginger (about equal to amount of garlic), minced
3 tomatoes, cored, diced
3 tbsp vegan butter
1 tbsp cumin
1 cinnamon stick
3-5 cardamom pods
2 tbsp garam masala
1 tbsp paprika (preferably spanish)
1 tsp turmeric
1/2 tbsp amchoor, or equivalent of lemon juice
2.5 cups oat milk, or one pack of grace coconut cream dissolved in 2 C water
1/2 tsp - 1 tbsp Indian red chili powder (to taste)
salt to taste
cilantro sprigs and some diced sweet pepper for garnish
1. Drain, rinse and pan fry 2 packs of NuPasta Fettuccini for 2-3 minutes. Set aside.
2. In a skillet or wok, heat melt your butter over medium-high heat until it sizzles.
3. Once the butter is hot enough, add your cinnamon, cardamom, and cumin. If you have hing (asafoetida) on hand, go ahead and add a half teaspoon.
4. Once your spices are browned and aromatic (about 20-30 seconds) add your diced onion, garlic, and ginger.
5. Add your garam masala and fry for 3 minutes or until onions are translucent.
6. Add your diced tomatoes, oat milk (or coconut cream), as well as your paprika and turmeric.
7. Add cooked or canned chickpeas and diced potatoes. Cover and reduce heat to low-medium. Cook for 1/2 hour or until potatoes are soft.
8. Add lemon juice or amchoor, red chili powder (be careful), and salt to taste.
9. Garnish with cilantro and diced red pepper.
Hing is known in the west as asafoetida. It is the root-derived resin of the ferula foetida or giant fennel, and has been used for millenia in Middle-eastern, Pakistani and Indian cooking, particularly in Punjabi cuisine. Its pungent smell has given it some less-than-flattering nicknames, such as devil's dung, but it's so aromatic and unique that it has also been called food of the gods. So pungent is the resin that it is now sold as a powder mixed with semolina and other flours.
Hing is a savoury enhancer with a flavour similar to onions or leeks with perhaps a more floral character, and a rather piercing aroma that becomes intoxicating while preparing a meal with it.
Hing is used in the first cooking stage of Indian dishes: the tempering stage. During this stage, you'll be heating oil or butter to anywhere between medium to high heat. I usually use a vegan butter, but canola or another oil that can stand higher heat will do. Once your oil is hot and dimpled, then you can add your hing before you add onions, garlic or fresh ginger, depending on the recipe you're working from (or creating). The hing will sizzle and bubble. (See above video)
Depending on your recipe, other spices such as cumin, cassia bark (or cinnamon stick), cardamom, mustard seed or anise will likely find their way into your hot oil as well. In order to prevent these and the hing from burning, have your onions/garlic/ginger diced, minced and ready to go so that you can add them quickly. Once added, the heat will transfer to these ingredients, and prevent scorching your spices. On medium-high, let your hing and whole spices sizzle for about 15-20 seconds, until they are brown and fragrant.
Bigger whole spice, such as cassia or anise, you may decide to add before the smaller spices.
Once you master the realtively simple process of tempering hing, you may use it in whatever dish you desire. As a rule, hing goes well in dishes where onion is a primary flavour, such as French onion soup, or potato leek. It can be a secret weapon for making a killer béchamel, or even an extra special hollondaise.
Hing or asafoetida is not just an Indian spice, and should really be celebrated by chefs and cooks everywhere. As always, please share your creations with us on Masterindian's facebook page or the homespun curries facebook page!
]]>Ginger garlic paste is often added with the onions, or just after the onions at the beginning of preparing an Indian dish. Not only is it incredibly healthy, but it is also a key flavour component of a vast number, probably the majority, of Indian entrées.
- 1/2 cup peeled and chopped ginger pieces
- 1/2 cup peeled and ended garlic
- 1 tbsp oil of your choice (Canola will do fine)
1. Wash the ginger and peel using a paring or a kitchen knife. Slice into small pieces.
2. To peel the garlic, we recommend using two medium metal mixing bowls, and shaking the garlic up and down in them for about one minute, it's noisy, it's smelly, but by and large, with most strains of garlic, it works amazingly to peel garlic in quantity.
1. Blend your ingredients in a food processor.
2. Scrape the sides and blend again, repeating until smooth; add up to one extra tbsp of oil if needed.
You can store your ginger garlic paste in the fridge for about a month, or in the freezer for around 6 months. In commerical kitchens, we've seen ginger garlic paste scooped with icecream scoops, frozen on sheet pans, then vacuum packed to preserve them for even longer than 6 months. You likely won't need to revert to such measures with your own ginger garlic paste, however freezing them in an ice cube tray will give you separate portions that you can thaw whenever you need them.
It's simple. In your fry oil, normally you will first fry your aromatic or whole spices. If you are using a higher heat, your spices will darken and become aromatic in 15-20 seconds, but if you're frying on medium, you can give them a minute to infuse in the oil.
Next you add your onions. When you add onions, you can add some ground spices, such as Garam Masala. It really depends on the recipe, but here we are giving some general guidelines about the layering process used in traditional Indian cooking.
Finally, after your onions begin to clarify, add your ginger garlic paste. For a 4-serving recipe, you can use between one and two tablespoons of ginger garlic paste, depending on the requirements of the recipe. Then you can let this spice/onion/ginger/garlic mix simmer for two minutes or so before adding the rest of your ingredients.
With this process in your cooking arsenal, you will be an unstoppable Indian chef, and you are one step closer to making easy authentic Indian food at home.
]]>The Hottest of the hot chili peppers are habañero (~500k Scoville heat units or SHU), the 7-pot family of peppers (~1M SHU-2MSHU), scorpion peppers (1.5-2M SHU), and the hottest of all, the Carolina Reaper (1.5-2.2M SHU), pictured above, dried along with some smaller Chocolate ghost peppers. By comparison a Jalapeño weighs in at about 5000 SHU. Yup, we're dealing with serious heat.
Generally speaking, microbes abhor super hot chilies. They will mildew in the refridgerator if given enough time (i.e., probably the amount of time it takes for a strain of mold to mutate to a point to where it can withstand the high concentrations of capsaicin) However, if you buy a small box of scorpion peppers, chances are you're only going to use a small amount so drying them is an essential step in consuming them. In my kitchen, I have about a dozen of these peppers dried. If I don't make a hot sauce, I'll have them for years.
To dry anything above 1M SHU, you can simply stem, halve, and set aside on a plate somewhere where no one will be tempted into a perilous inspection of its contents. High shelves in the kitchen where there is little traffic and little humidity are perfect. You can leave out ghosts, 7 pots, or reapers, and they will simply dry out over a week or so.
If you live somewhere with a lot of ambient humidity, you can dry them in the oven by turning it on to its minimum setting, which should be something close to 180° or 170° C. When I have to oven dry hot peppers, I halve every pepper with gloves and a paring knife, and I dry in half-hour rounds, letting them cool for almost an hour in between, which prevents them from cooking or roasting too much. It also keeps the air from getting unbreathable. Generally, after about 8 half-hour rounds, they're ready. When finished drying, immediately seal the peppers in a mason jar or zip lock bag so that they remain dry.
From dried or fresh, you can make a paste with your peppers. This is a way to have the peppers ready to go when you need them. Generally this means a little water in a small pot, and cooking the peppers slowly, adding more water if needed.
Chefs do this in commercial kitchens where there are powerful vents above the ranges and grills, but likely you'll have a modest range hood above your stove or cooktop, in which case cooking super hot chilies will result in an unbreathable air quality similar to that produced by angry riot police.
If possible, use a portable burner outdoors or a barbecue side-burner to make your super-hot chili paste. Make sure the wind is not blowing toward a close neighbour's window (unless you really don't like that neighbour). Some sugar and vinegar will help preserve the paste: the amount will of course depend on your batch size. But if you want a general guideline, here is a recipe:
12 grams (or about a dozen dried) reaper peppers, or 15-20 dried ghost peppers
1 cup water (1/2 if using fresh)
1-2 tbsp sugar
1-2 tbsp vinegar
Add water as needed. Once your peppers are soft enough to blend, an immersion blender works best, but can only be used with larger batch sizes. You may use a blender as well, and be advised that when rinsing hot peppers from your cookware, the air becomes very spicy indeed.
For the same reason you don't want to cook a pepper paste on your stovetop, we direct you to add your super hot peppers at the end of your cooking process. Never put a ghost pepper in your taarka, or at the beginning of the cooking process. Better to add a ground, dried pepper or pepper paste to the almost-complete dish, say for the final 3 minutes; just enough to combine the flavour of the hot peppers into the dish.
Dishes that require a lot of Lal Mirch or Indian red Chili, or that require a lot of green chilies, should be left alone. Unless you're a hot-head (which you may be if you're reading this article) there's generally no need to make these dishes spicier. What's more, the flavour that comes along with them is usually definitive of the dish being made. Lal Maas, which uses several ground rajasthani chilies, is one example. For this reason we don't recommend substituting super hot peppers for milder ones.
Super hot peppers come in handy when you don't want to interfere with the flavour of a dish, but you want it to be spicier. A korma for example, uses some Indian red chili, but is usually served mild. Or if your dish is already quite hot, but you want to take it to the next level, then you may add, say, 1 or 1/2 ghost pepper.
Combining super hot peppers with aromatic spices is where extra spicy curries get very interesting. Our own Patiala Chicken cooking kit, for example, uses a lot of aromatic spices like cassia, cloves, cardamom, and usually when you have a lot of these aromatics in your curry, you'll want it to be hotter.
Finally, Super Hot Peppers are the key ingredient in Indian Phaal, of which there are some recipes online. This one for lamb Phaal is one we can recommend, but, again, we caution against cooking the hot peppers for any length of time in a place without great ventilation.
All hot peppers, if handled, will burn. Then they burn whatever you touch. Your eye, your ear, whatever. Reapers and ghosts, especially so. When handling them, it's essential to wear gloves.
Once you have cut and processed super hot peppers, you should clean your knives and clean your cutting surface immediately. The last thing you want is to feed your child a nice slice of bread and peanut butter that for some reason is a 10 on the scoville scale.
Enjoy your super hot peppers responsibly, and as always, we invite you to share your creations with us on facebook and instagram. #masterindian
]]>2 cups strawberries, well-rinsed and hulled
1 tbsp lal mirch or Indian red chili powder
1/4 cup sugar
Juice of 1/2 lemon
1 1/2 tbsp corn starch
1 cardamom pod, crushed
1. Crush hulled strawberries, and heat over medium heat in a small saucepan
2. Mix corn starch with some of the crushed strawberry and the lemon juice
3. Once the crushed strawberry starts to boil, add sugar, chili powder, cardamom, and cornstarch mix, stirring continuously.
4. Let cool and serve over ice cream or a strawberry shortcake.
There are a lot of peppers you can use in a sauce like this, but there are some you can't. We've used Indian powder because it's very hot, and it has a fruitier flavour compared to, say, cayenne. We've made this recipe a few times with ghost or scorpion peppers, which sounds scary, but in fact the hotter peppers go extremely well with this kind of sauce because of their strong floral overtones and because you can use less of them to make the sauce spicy.
]]>Indian food is also often hot, and the delicious flavours that make most Indian dishes what they are often come with a lot of heat, so how do you find the right flavours without all that heat? Green chilies are one ingredient that will put you in this quandary. We know not everyone can take the full heat of a spicy Indian green chili, but the flavour of green chilies adds so much to a dish that they're an indispensable ingredient. You can substitute a green bell pepper, and it will taste fine, but really there is no better substitute for green chilies than poblano peppers.
Poblano is one of the most popular peppers in Mexico. Poblano peppers are beautifully mild green peppers that impart a deeper, smokier flavour than comparable green bell peppers. Compared to Indian green chilies, Poblanos are extremely mild, about 1000-2000 scoville units per pepper compared to 15,000-30,000 scoville units for a green chili.
Though they originate in Mexico, they are well-adapted to Indian cuisine. In dishes that call for green chilies, a poblano can be stemmed, and sliced lengthwise. Poblanos are often roasted, a process which brings out a muskier, sweeter flavour that works extremely well in blended sauces. If you want to retain what little heat the poblano can offer, then simply slice the pepper lengthwise, and remove the seeds and gills.
There are a few ways to cook peppers in Indian cuisine, however the most common way is to fry them up slowly with onions using a technique called bhuno. Essentially you get your pan just hot enough to fry, then you add your onions, peppers, and perhaps some whole cardamoms or a teaspoon of garam masala and cook over a medium heat until the onions are translucent and sweet.
We should mention that there are two varieties of Poblano pepper, both green and red. The green are mild, the red can be quite spicy, so if you're buying as a mild substitute for green chilies, make sure you're buying green.
In curry dishes where green chilis are an essential finishing touch, such as Tikka, these peppers are perfect. If you do give them a try, let us know by sending us pictures on instagram.com/masterindian, or sharing your results on our facebook page!
]]>
1/2 medium-sized onion fine, diced
3-4 cloves garlic, minced
1 tsp olive oil or butter
1 cup sour cream
2 tsp coriander seed
1 tsp cumin seed
1 cardamom pod (optional)
1/8 tsp carom seed or ajwain (optional)
1/2 tsp feunugreek leaves or kasoori methi (optional)
1-3 tsp Indian red chili (since this dish is dairy-based, it will moderate the spiciness of the chili)
Juice of 1/2 lemon salt to taste
1. Over medium heat, melt the butter or heat the olive oil, grind your whole spices
2. Let spices simmer in oil over medium heat for 1-2 minutes or until fragrant
3. Add diced onion and minced garlic and cook for 10-15 minutes until transparent. Add oil if necessary
4. Once onion/garlic/spices are cooked, remove from heat and add lemon juice. Stir with spatula until deglazed (until any film left from the cooking of onions and spices is gone from the bottom of the pot)
5. Add to 1 cup sour cream, along with red chili, fenugreek leaves and salt. Garnish with red chili and a pinch of fenugreek leaves. Enjoy!
]]>
Buy the Turmeric Chicken Curry Spice Kit
1. Chicken breast, boneless (500 grams)
2. Cooking oil: 3 tbsp
3. Onion: 1 medium
4. Plain yogurt: 250 grams (1 cup)
5. Ground Almonds: 1/2 cup
6. Fresh cilantro (optional)
7. 1 Master Indian Spice Patiala Chicken Curry kit (see recipe for contents)
1. Cut the chicken (500 grams) into bite-sized pieces and marinate with plain yogurt (250 grams) and SPICE PACK 1 (turmeric, salt)
2. Rougly dice the onion (1 medium).
3. Crush or grind the almonds (1/2 cup) if required.
1. In a non-stick pan, heat oil (3 tbsp) over medium-high heat and fry the onions with SPICE PACK 2 (dry ginger and garlic) until golden (about 2 to 4 minutes.)
2. Now add the marinated chicken, SPICE PACK 3 (coriander, cumin, paprika powder) and sear for 1 minute.
3. Next add warm water (125 ml or 1/2 cup), turn heat down to medium-low and cook for 15 minutes, covered, until the chicken is completely cooked.
4. Adjust the heat level to your liking by adding SPICE PACK 4 (Indian red chili powder). Turmeric chicken curry is best served medium or hot. Be careful, this spice is HOT!!!
5. Mix in the ground almonds, SPICE PACK 5 (garam masala, custom blend), and garnish with fresh cilantro (optional)
Serve with... freshly-cooked basmati or jasmine rice with a side of warm naan bread.
Buy the Turmeric Chicken Curry Spice Kit
- 1 lb medium-firm tofu
- 1 medium-size onion, fine-diced
- 1 large tomato (about 1 cup of diced)
- 2 poblano peppers (or 1 green bell pepper), cored, fine diced
- 5 garlic cloves minced
- 2" knob peeled, minced ginger
- 1 tbsp vegan butter (Becel is fine, and also cheapest)
- 3 tbsp rice vinegar
- 2 tbsp maple syrup
- 1 tbsp garam masala
- 1/4 tsp asafoetida (hing)
- 2 tbsp coriander
- 1 tsp cumin
- 1/2 tsp rosemary
- 1/2 tsp cardamom
- 3-4 small pieces cinnamon or cassia bark
- 1/4 tsp fenugreek seed
- salt and red chili powder to taste
- 1/2 package Grace coconut cream (cut the package lengthwise down the middle)
- 1 cup water
- 1 tbsp wole cumin seeds
- 1 tsp turmeric
- juice of 1/2 lime
- salt to taste
1. Start the water boiling for your pasta shells.
2. "Grind" the tofu simply by squeezing it.
3. Once the tofu is ground, then you can add the vinaigre, syrup, minced garlic, ginger, and garam masala, then set aside.
4. Add 12-16 pasta shells to your boiling water along with 2 tbsp salt, and 1 tsp whole cumin seed; boil for 20 min to 1/2 hr.
5. In a large skillet one medium-high heat, melt one tbsp vegan butter
6. Add the asafoetida, and powdered cardamom, fenugreek, cinnamon, cumin, coriander, rosemary, and let sizzle for 10-15 seconds; just long enough to grab your already-diced vegetables. This spice mix will impart that citrussy note you find in Madras curry.
7. To the skillet, add diced onion, pepper, and tomato. Cook until transparent, then add the marinaded ground tofu.
8. Add red chili powder (lal mirch) and salt to taste. Scoop into a mixing bowl.
9. Check shells to see if they're done, and dissolve your half pack of coconut cream sauce in 1 cup of water. You want a thick, saucy consistency.
10. Add whole cumin, turmeric, and lime juice to sauce, and stir. Allow the sauce to reduce if needed. (You may decide to double the recipe.)
11. Drain, and stuff shells; serve with sauce on the side - if you want, garnish the sauce with whole cumin seeds.
12. Enjoy!
]]>1/4 cup plain peanut butter (it's ok if it has sugar)
1/2 cup ginger beer
1/2 cup non-dairy milk
1.5 tbsp coconut oil
1 medium onion, minced
3-6 cloves garlic, minced
1 inch fresh ginger, peeled minced (optional)
2 tbsp red curry paste
1tbsp fresh lime juice (2 tbsp liquid tamarind is also perfect)
1 tbsp chopped thai basil (if you have no thai basil, you can substitute plain basil, and add 1/8 tsp freshly ground fennel. It'll do in a pinch)
1-3 tsp Indian red Chili (to taste)
salt to taste
1/2 package (1/2 pound) tofu small diced
1 can black beans, drained rinsed
4 generous handfuls of salad greens (rinsed)
1 medium tomato
1 avocado
1/2 cup peanuts/pumpkin seeds (for garnish)
salt, pepper
1. Heat coconut oil on medium heat, slowly frying your minced onions, ginger and garlic until all are transparent. (about 10 minutes).
2. Add the curry paste and peanut butter, and whisk with a fork while slowly adding the ginger beer and then the almond milk.
3. Add the basil, lime juice or tamarind, indian chili, salt, and let simmer on low. The consistency should be just a little bit thicker than a salad dressing.
4. In a lightly oiled pan, fry the beans and tofu, dashing a little salt and pepper.
5. Assemble all black bean bowl ingredients, starting with salad greens, drizzle a very generous portion of the sauce and top followed by garnishes such as peanuts and pumpkin seeds.
6. Serve and enjoy!
]]>
1-3 tbsp vegan butter (Earth Balance or Becel Vegan are both great)
1/8 tsp asafoetida or hing (optional)
1/8 tsp carom or ajwain (optional)
1.5 tsp cumin seeds
2-3 inches cinnamon stick or cassia bark
2-3 Indian Bay Leaves or tej patta (optional)
1 tbsp paprika
1 tsp turmeric
1 tsp salt
1 medium sized onion, fine diced
3-6 garlic cloves minced
1-2" knob of ginger, peeled, minced
1 cup lentils
2 tomatoes, diced.
Juice of 1/2 lemon
1 tbsp sugar (optional)
1-3 tsp chili powder (to taste)
1 package of your favorite tempeh (about 200 g) - We recommend lightlife tempeh because of it's firmer texture and it doesn't have the chalkiness that many tempeh products seem plagued with.
1. Start by boiling 2 cups water, and adding your lentils. Bring to boil and then simmer over medium-low.
2. peel and dice your onion, garlic, ginger. Hull and dice your tomatoes.
2. In a wok or large pan, melt your vegan butter on medium-high heat.
3. Once the butter is melted add your carom, asafoetida, cumin, cinnamon, bay leaves, and cinnamon. Let these fry in the oil until brown and fragrant. Be careful not to burn them.
4. Add onion, garlic and ginger, garam masala, and fry until transparent.
5. Large dice your tempeh, and add it to the mixture.
6. Add the diced tomatoes, plus paprika, turmeric, and salt, cook until tender
7. Now add your lentils, lemon juice, and sugar (optional)
8. Add your Indian chili powder (lal mirch) until the dish is hot enough.
The Indian Spices in this recipe (ajwain, hing, tej patta, lal mirch) are readily available at all Indian grocery stores. The recipe can do without them, but really they're the authentic ingredients that make the dish, and having them on hand and getting into the habit of using them will soon transform your cooking!)
Serve with Naan, Paratha, basmati or wild rice.
]]>
Master Indian Spice brings a completely authentic, delicious, and easy-to-make Madras recipe to North America. We have created the Madras spice kit, which you can use in this recipe to create. In our spice kit recipe below, we've included the whole method, including the spices used at each step
(Buy the Madras spice kit here)
1. Cut the chicken (500 grams) into bite-sized pieces.
2. Roughly dice the onion (1 large).
1. Heat oil (2 tbsp) in a large pan over a medium heat, and fry the diced onions until lightly brown.
2. Next add the contents of SPICE PACK 1 (coriander, turmeric, salt, fennel, chili, black pepper, fenugreek, garlic, cumin, bay leaf, ginger, cassia), warm water (250 ml) and cook over low heat until the mixture is bubbling.
3. Now add the chicken, coconut milk (250 ml) and simmer for 10 to 15 minutes until the chicken is fully cooked.
4. Mix in the contents of SPICE PACK 2 (garam masala - custom blend).
5. Adjust the heat level to your liking by adding SPICE PACK 3 (chili powder). Madras curry is traditionally served hot, but it is delicious mild, too. Be careful, this spice is HOT!!!
Mild:none Medium:1/2 tsp Hot: 1 tsp or more
6. Garnish with fresh cilantro (optional).
(Buy the Madras spice kit here)
Serve With... plain basmati rice. A mango lassi (traditional yogurt drink) would pair nicely, especially if you choose to make it hot. (Check out our blueberry mango lassi recipe here: https://www.youtube.com/watch?v=q8pZ2z6PBKY)
Buy the Patiala Chicken Curry Spice Kit
1. Chicken drumsticks/thighs with bone: 1kg
2. Cooking oil: 4 tbsp
3. Onion: 1 large
4. Tomatoes: 3 medium
5. Coconut milk: 2 tbsp
6. Fresh cilantro for garnish
7. 1 Master Indian Spice Patiala Chicken Curry kit (see recipe for contents)
1. Remove the skin from the chicken, make scores in the flesh to allow the spices to penetrate. Wash under cold water.
2. Rougly dice the onion (1 large) and the tomatoes (3 medium).
1. In a large pan with a cover, heat oil (4 tbsp) over high heat an dtoast the dry spices in SPICE PACK 1 (whole cinnamon, cardamom, cloves)
2. Now fry the diced onions until brown, about 2 to 4 minutes.
3. Add SPICE PACK 2 (dry ginger and garlic), and sauté for 30 seconds.
4. Next, add the scored chicken and sear all sides to lock in the juices. Add SPICE PACK 3 (paprika powder, turmeric, coriander, cumin, salt).
5. Add the diced tomatoes and cook for 1 minute.
6. Now add plain regular coconut milk (2 tbsp), warm water (250 ml or 1 cup), and turn heat down to medium-low. Cook covered for 15 to 20 minutes until the chicken is fully-cooked.
7. Adjust the heat level to your liking by adding SPICE PACK 4 (red chili powder) Traditionally served extra hot. Use caution.
8. Lastly, stir in SPICE PACK 5 (garam masala) and garnish with fresh cilantro (optional).
Buy the Patiala Chicken Curry Spice Kit
]]>
Tikka Ingredients
Preparation of the Tikka
1. Cut the onion (1/2 medium) and green bell pepper (1/2 piece) into 1/2 inch chunks.
2. Cut chicken (500 grams) into bite-sized pieces and marinate with plain yogurt (125 grams), lemon juice (1/2 squeezed), SPICE PACK 1 (Ginger, Dry Garlic, Paprika powder, Garam Masala (Custom Blend), Fenugreek, Coriander, Turmeric, Salt), onion chunks and bell pepper chunks for 15 minutes to overnight. Follow the same steps with the vegetarian options.
3. Finaly dice onion (1.5 medium). In a blender, blend tomatoes (3 medium or 350ml canned) into a smooth sauce.
Cooking the Tikka
1. Preheat the oven to 400F and bake the marinated chicken for 25 minutes, until the chicken is fully cooked.
2. Heat oil (2 tbsp) in a pan on medium high heat and toast the contents of SPICE PACK 2 (Cumin seeds, Ginger, Dry Garlic) for 15 seconds.
3. Add the diced onions and fry until translucent.
4. Now add the blended tomato sauce, ketchup (4 tbsp), SPICE PACK 3 (Coriander, Paprika powder, Turmeric, Cumin) and mix well until the gravy starts to bubble.
5. Adjust the heat level to your liking by adding SPICE PACK 4 (Chili Powder). Tikka masala is best served mild or medium. Be careful, this spice is HOT!!!
6. Mix in SPICE PACK 5 (Garam Masala, Fenugreek leaves), cream (2 tbsp), and the baked chicken into gravy. Simmer for 2 to 5 minutes.
Serve with... Enjoy over Basmati rice or scoop with any Indian breads such as naan or paratha.
1. Chicken breast, boneless: 500 grams
2. Cooking oil: 3 tbsp
3. Onion: 1 medium
4. Tomato: 1 medium
5. Regular coconut milk: 400 ml (1 can)
6. Ground almonds: 1/2 cup
7. One Master Indian Spice Kit
1. Cut the chicken (500 grams) into bite-sized pieces and marinate with oil (1 tsp) and SPICE PACK 1 (custom garam masala blend, black pepper, Salt) for 10 minutes to 2 hours in a refrigerator.
2. In a blender, blend the onion (1 medium) or finely mince with a knife.
3. Dice the tomato (1 medium) very fine.
1. Heat oil (1 tbsp) in a deep pan over medium-high heat and fry the minced/blended onions for 2 minutes.
2. Now add warm water (125 ml or 1/2 cup) and stir for 1 minute.
3. Add diced tomatoes, ground almonds (1/2 cup), and SPICE PACK 2 (paprika powder, ginger, dry garlic, sugar, turmeric, garam masala (custom blend), coriander, salt, black pepper, cumin) Mix well. Optionally, you may toast your ground almond in the oven or in a dry frying pan until slightly browned. (for more on this visit this article)
4. Once the gravy starts to bubble, add coconut milk (400 ml), turn down the heat and simmer for 20 minutes, covered. Stir occasionally.
NOTE: Start step 5 after 15 minutes.
5. Heat oil (2 tbsp) in a different pan over medium heat and fry the marinated chicken for 3 to 5 minutes, searing all sides.
6. Add the chicken into the gravy and simmer for 10 minutes.
7. Adjust the heat level to your liking by adding SPICE PACK 3 (red chili powder). Korma chicken curry is best served mild or medium. Be careful, this spice is HOT!!!
Serve with... scoop up this delicious Korma chicken with a spoonful of freshly-cooked basmati rice. Naan bread or paratha bread complements this dish exceptionally well.